Avery Dennison Easy Apply technology was designed to make fleet and vehicle wraps easier and quicker than in the past. Installers of any skill level should be able to apply Avery Dennison films featuring Easy Apply and Easy Apply RS technology faster while limiting wrinkling and air bubbles - providing a cost savings to the installer or graphics company. We'll share specific install tips in the article.
Avery Dennison™ Easy Apply films will allow installers of all levels to install graphics with greater ease and in less time. The wide range of Avery Graphics opaque and digital films available with Easy Apply Easy Apply RS (EZ RS) films have the added advantage of repositionability, or slideability of graphics as well as air egress. Professional looking graphics can be easier and less costly to achieve when using these films.
Rob Ivers, a nationally known and experienced graphics installer, says of the new Avery Graphics MPI 1005 Supercast Easy Apply RS, “This is without a doubt the most conformable, easy to apply vinyl I have ever installed in my thirty plus years of graphic installation. And, it's not just a little better, not just twice as good, it's magical. I cannot imagine this product not redefining the world of vehicle wraps.”
The installation steps for films featuring Easy Apply and Easy Apply RS technology are very similar to what you would do with other films:
- Prepare the application surface. A clean, dry application surface is absolutely necessary to facilitate the proper bonding of an adhesive to the application surface.
- Take the time to review the recommended application temperature for the film, air and substrate. A minimum temperature of 60°F is recommended.
- Select the installation tools and techniques you’ll be using.
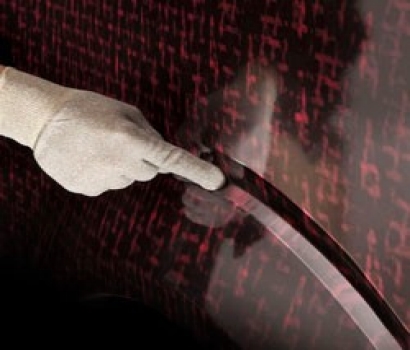
- Apply the graphic.
- Overlap all strokes by about 50 percent.
- When using a squeegee, hold it at 50-70 degrees to the surface. The flatter the better.
- Remove air bubbles and tenting around rivets.
- Remove air bubbles by applying pressure to the middle of the bubble with your thumb and rub out toward the bubble edges. The air will disperse along the air egress channels. Unless the bubble is over 1 inch in diameter, you don’t need to make air release holes.
- Tenting around rivets can be eliminated with an air release tool, heat source and rivet brush or by pressing the top of the rivet head down, forcing air away from the rivet and into the flat area surround the rivet head.
- Secure the film around the rivet head by using a heat source and working the film in a circular counter clockwise motion back towards the base of the rivet head.
- Final squeegee pass and tips on good re-squegee techniques.
- Wait at least 5-10 minutes after the application to allow the adhesion to build to the functional bond level.
- Remove the pre-mask.
- Re-squeegee all edges, overlaps and seams of the decal with firm pressure.
These details and more are available in this Instructional Bulletin.
For more information on Avery Graphics products, pricing or roll sizes, printers can visit www.averygraphics.com to locate a distributor (on the Partner Page) or contact Avery Dennison at 800-282-8379 for additional product information.