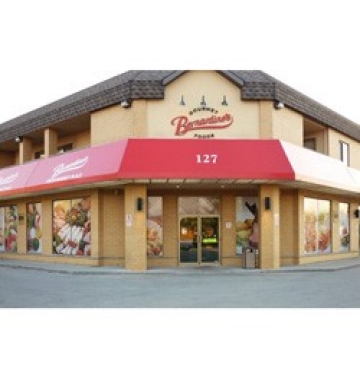
Perforated window graphics are a great promotional tool. They can help brands and retailers increase awareness through applications like building graphics, vehicle wraps - for buses, trains, cars, gondolas, etc. - and decorative graphics on a retailer's window can help attract and bring people into the store. The installation can be a bit tricky though. We've put together some installation tips and tricks.
Avery Dennison™ Perforated Window Films are comprised of a perforated calendered face film on a solid liner, or perforated white liner (the perforated liner has a continuous (non-perforated) clear film on the back side). The advantage of these films is that they have a continuous hole pattern perforated into the film so that a printed graphic is visible from one side, but can be seen through from the other. Avery DOL 1560 Optically Clear laminate film should be used to protect the graphics and also make removal easier.
Avery Dennison Perforated Window Films all feature a matte finish, are 7 mil with a clear polyester liner and black removable adhesive. The films can be solvent and UV-curable printed.
Three options include:
- MPI 2528 Perforated Window 50/50, 1.5 mil hole
- MPI 2728 Perforated Window 65/35, 1.5 mil hole, larger print area, NOT for vehicle applications
When choosing a perforated window film, make sure to keep viewing requirements in mind in addition to following any state or local government guidelines.
Installation recommendations:
- Testing should be performed prior to application to ensure proper adhesion of graphics to window substrates. If there are any low surface energy coatings present on the substrates (i.e. silicone), loss of adhesion may occur.
- Clean the window thoroughly with Isopropyl Alcohol (IPA). Be sure no residue from the IPA is present during application. Do NOT use Windex, or ammonia based cleaners.
- Wet application methods are not recommended for perforated window film graphics. Water will be trapped in holes causing vision to be obscured when looking through graphics.
- Measure the decal to be applied and be sure the graphic fits into the window with a clearance around any rubber gasket. At no time should the graphic touch or overlay any window moldings. Loss of adhesion causing material failure can occur if material overlaps moldings.
- A hinge installation works best. Start by taping the top of the image to position into place on the window while the liner is still attached. Flip the graphic back down and start applying squeegee pressure on the film creating adhesive contact to the window, removing the liner as you go. Start the squeegee action in the middle of the image and squeegee from one side to the other. Continue this process from the top of the decal down using overlapping strokes and removing the liner as you go. If needed, the graphic can be adjusted carefully after pressure to realign the material or take out wrinkles, material must be resqueegeed after repositioning.
- Use a 0.25 in. (6mm) brush to apply sealer in order to have greater control and make a neater application. All exposed edges and seams of exterior decals must be sealed with edge sealer. This will prevent water and contaminants from getting under the film and obstructing viewing or contaminating the adhesive.
Removal instructions and more installation details are available in the Instructional Bulletin.
For more information on Avery Graphics products, pricing or roll sizes, printers can visit www.averygraphics.com to locate a distributor (on the Partner Page) or contact Avery Dennison at 800-282-8379 for additional product information.

